2021-04-11 MyBatis运行流程-02
本文共 3048 字,大约阅读时间需要 10 分钟。
文章目录
获取SqlSession对象
具体操作
openSession()openSessionFromDataSource()- 获取一些信息,创建事物管理器
tx newExecutor()- 根据
Executor在全局配置中的类型,创建出SimpleExecutor/ReuseExecutor/BatchExecutor - 如果有二级缓存配置开启,创建
CachingExecutor(executor) - 使用每一个拦截器重新包装
executor并返回 - 创建
DefaultSqlSession,包含Configuration和Executor - 返回
DefaultSqlSession
源码分析
1. openSession()
SqlSession openSession = sqlSessionFactory.openSession();
2. openSessionFromDataSource()
从configuration中拿到默认的Executor类型。Executor类型的类型有三种:SIMPLE/REUSE/BATCH。
@Override public SqlSession openSession() { return openSessionFromDataSource(configuration.getDefaultExecutorType(), null, false); } 3. 获取一些信息,创建事物管理器tx
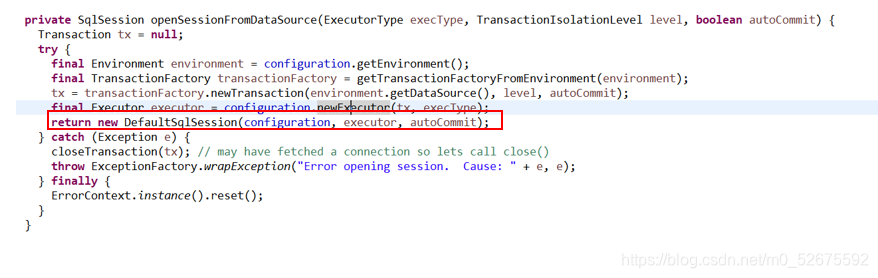
private SqlSession openSessionFromDataSource(ExecutorType execType, TransactionIsolationLevel level, boolean autoCommit) { Transaction tx = null; try { //从全局配置中获取环境等信息 final Environment environment = configuration.getEnvironment(); final TransactionFactory transactionFactory = getTransactionFactoryFromEnvironment(environment); //创建事务 tx = transactionFactory.newTransaction(environment.getDataSource(), level, autoCommit); final Executor executor = configuration.newExecutor(tx, execType); return new DefaultSqlSession(configuration, executor, autoCommit); } catch (Exception e) { closeTransaction(tx); // may have fetched a connection so lets call close() throw ExceptionFactory.wrapException("Error opening session. Cause: " + e, e); } finally { ErrorContext.instance().reset(); } } 4. newExecutor()
传入的参数为事务管理器和Executor的类型,根据传入的类型来创建Executor,Executor是一个接口,是用来增删改查的。
final Executor executor = configuration.newExecutor(tx, execType);
5. 根据Executor在全局配置中的类型,创建出SimpleExecutor/ReuseExecutor/BatchExecutor
public Executor newExecutor(Transaction transaction, ExecutorType executorType) { executorType = executorType == null ? defaultExecutorType : executorType; executorType = executorType == null ? ExecutorType.SIMPLE : executorType; Executor executor; if (ExecutorType.BATCH == executorType) { executor = new BatchExecutor(this, transaction); } else if (ExecutorType.REUSE == executorType) { executor = new ReuseExecutor(this, transaction); } else { executor = new SimpleExecutor(this, transaction); } //看全局配置中是否配置了二级缓存,如果有用CachingExecutor包装 if (cacheEnabled) { executor = new CachingExecutor(executor); } //使用拦截器包装executor executor = (Executor) interceptorChain.pluginAll(executor); return executor; } 6. 如果有二级缓存配置开启,创建CachingExecutor(executor)
对二级缓存的具体操作:
public CachingExecutor(Executor delegate) { this.delegate = delegate; delegate.setExecutorWrapper(this); } 7. 使用每一个拦截器重新包装executor并返回
pluginAll具体实现:拿到所有的拦截器,调用每一个拦截器的plugin方法。
public Object pluginAll(Object target) { for (Interceptor interceptor : interceptors) { target = interceptor.plugin(target); } return target; } 8.创建DefaultSqlSession,包含Configuration和Executor
9.返回DefaultSqlSession
总结:
DefaultSqlSession是sqlSession的实现类,里面包含了Executor和Configuration,Executor在这一步会被创建。 转载地址:http://mpwc.baihongyu.com/
你可能感兴趣的文章
NHibernate学习[1]
查看>>
NHibernate异常:No persister for的解决办法
查看>>
NIFI1.21.0_Mysql到Mysql增量CDC同步中_日期类型_以及null数据同步处理补充---大数据之Nifi工作笔记0057
查看>>
NIFI1.21.0_NIFI和hadoop蹦了_200G集群磁盘又满了_Jps看不到进程了_Unable to write in /tmp. Aborting----大数据之Nifi工作笔记0052
查看>>
NIFI1.21.0通过Postgresql11的CDC逻辑复制槽实现_指定表多表增量同步_增删改数据分发及删除数据实时同步_通过分页解决变更记录过大问题_02----大数据之Nifi工作笔记0054
查看>>
NIFI1.23.2_最新版_性能优化通用_技巧积累_使用NIFI表达式过滤表_随时更新---大数据之Nifi工作笔记0063
查看>>
NIFI从MySql中增量同步数据_通过Mysql的binlog功能_实时同步mysql数据_根据binlog实现数据实时delete同步_实际操作04---大数据之Nifi工作笔记0043
查看>>
NIFI从MySql中增量同步数据_通过Mysql的binlog功能_实时同步mysql数据_配置binlog_使用处理器抓取binlog数据_实际操作01---大数据之Nifi工作笔记0040
查看>>
NIFI从MySql中增量同步数据_通过Mysql的binlog功能_实时同步mysql数据_配置数据路由_实现数据插入数据到目标数据库_实际操作03---大数据之Nifi工作笔记0042
查看>>
NIFI从MySql中离线读取数据再导入到MySql中_03_来吧用NIFI实现_数据分页获取功能---大数据之Nifi工作笔记0038
查看>>
NIFI从MySql中离线读取数据再导入到MySql中_无分页功能_02_转换数据_分割数据_提取JSON数据_替换拼接SQL_添加分页---大数据之Nifi工作笔记0037
查看>>
NIFI从PostGresql中离线读取数据再导入到MySql中_带有数据分页获取功能_不带分页不能用_NIFI资料太少了---大数据之Nifi工作笔记0039
查看>>
nifi使用过程-常见问题-以及入门总结---大数据之Nifi工作笔记0012
查看>>
NIFI同步MySql数据_到SqlServer_错误_驱动程序无法通过使用安全套接字层(SSL)加密与SQL Server_Navicat连接SqlServer---大数据之Nifi工作笔记0047
查看>>
Nifi同步过程中报错create_time字段找不到_实际目标表和源表中没有这个字段---大数据之Nifi工作笔记0066
查看>>
NIFI大数据进阶_FlowFile拓扑_对FlowFile内容和属性的修改删除添加_介绍和描述_以及实际操作---大数据之Nifi工作笔记0023
查看>>
NIFI大数据进阶_NIFI的模板和组的使用-介绍和实际操作_创建组_嵌套组_模板创建下载_导入---大数据之Nifi工作笔记0022
查看>>
NIFI大数据进阶_NIFI监控的强大功能介绍_处理器面板_进程组面板_summary监控_data_provenance事件源---大数据之Nifi工作笔记0025
查看>>
NIFI大数据进阶_NIFI集群知识点_认识NIFI集群以及集群的组成部分---大数据之Nifi工作笔记0014
查看>>
NIFI大数据进阶_NIFI集群知识点_集群的断开_重连_退役_卸载_总结---大数据之Nifi工作笔记0018
查看>>